

How To Install Home Decor Flooring Vinyl Flooring


I'm sharing my all-time tips and tricks to easily and rapidly install Luxury Vinyl Plank (LVP) Floor in your home.
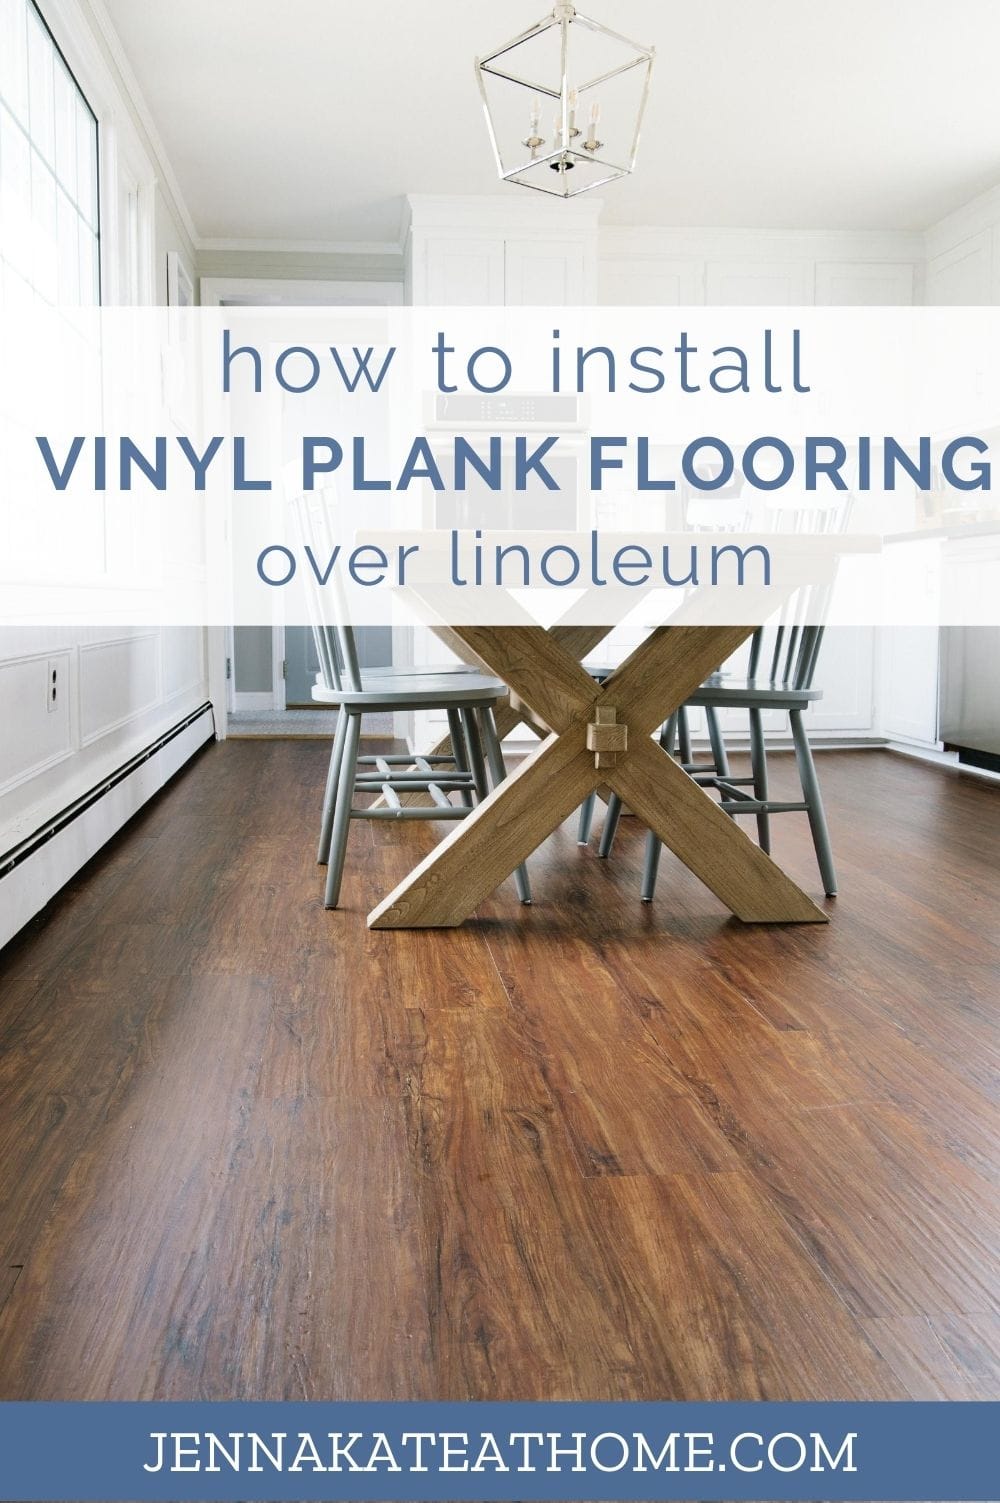
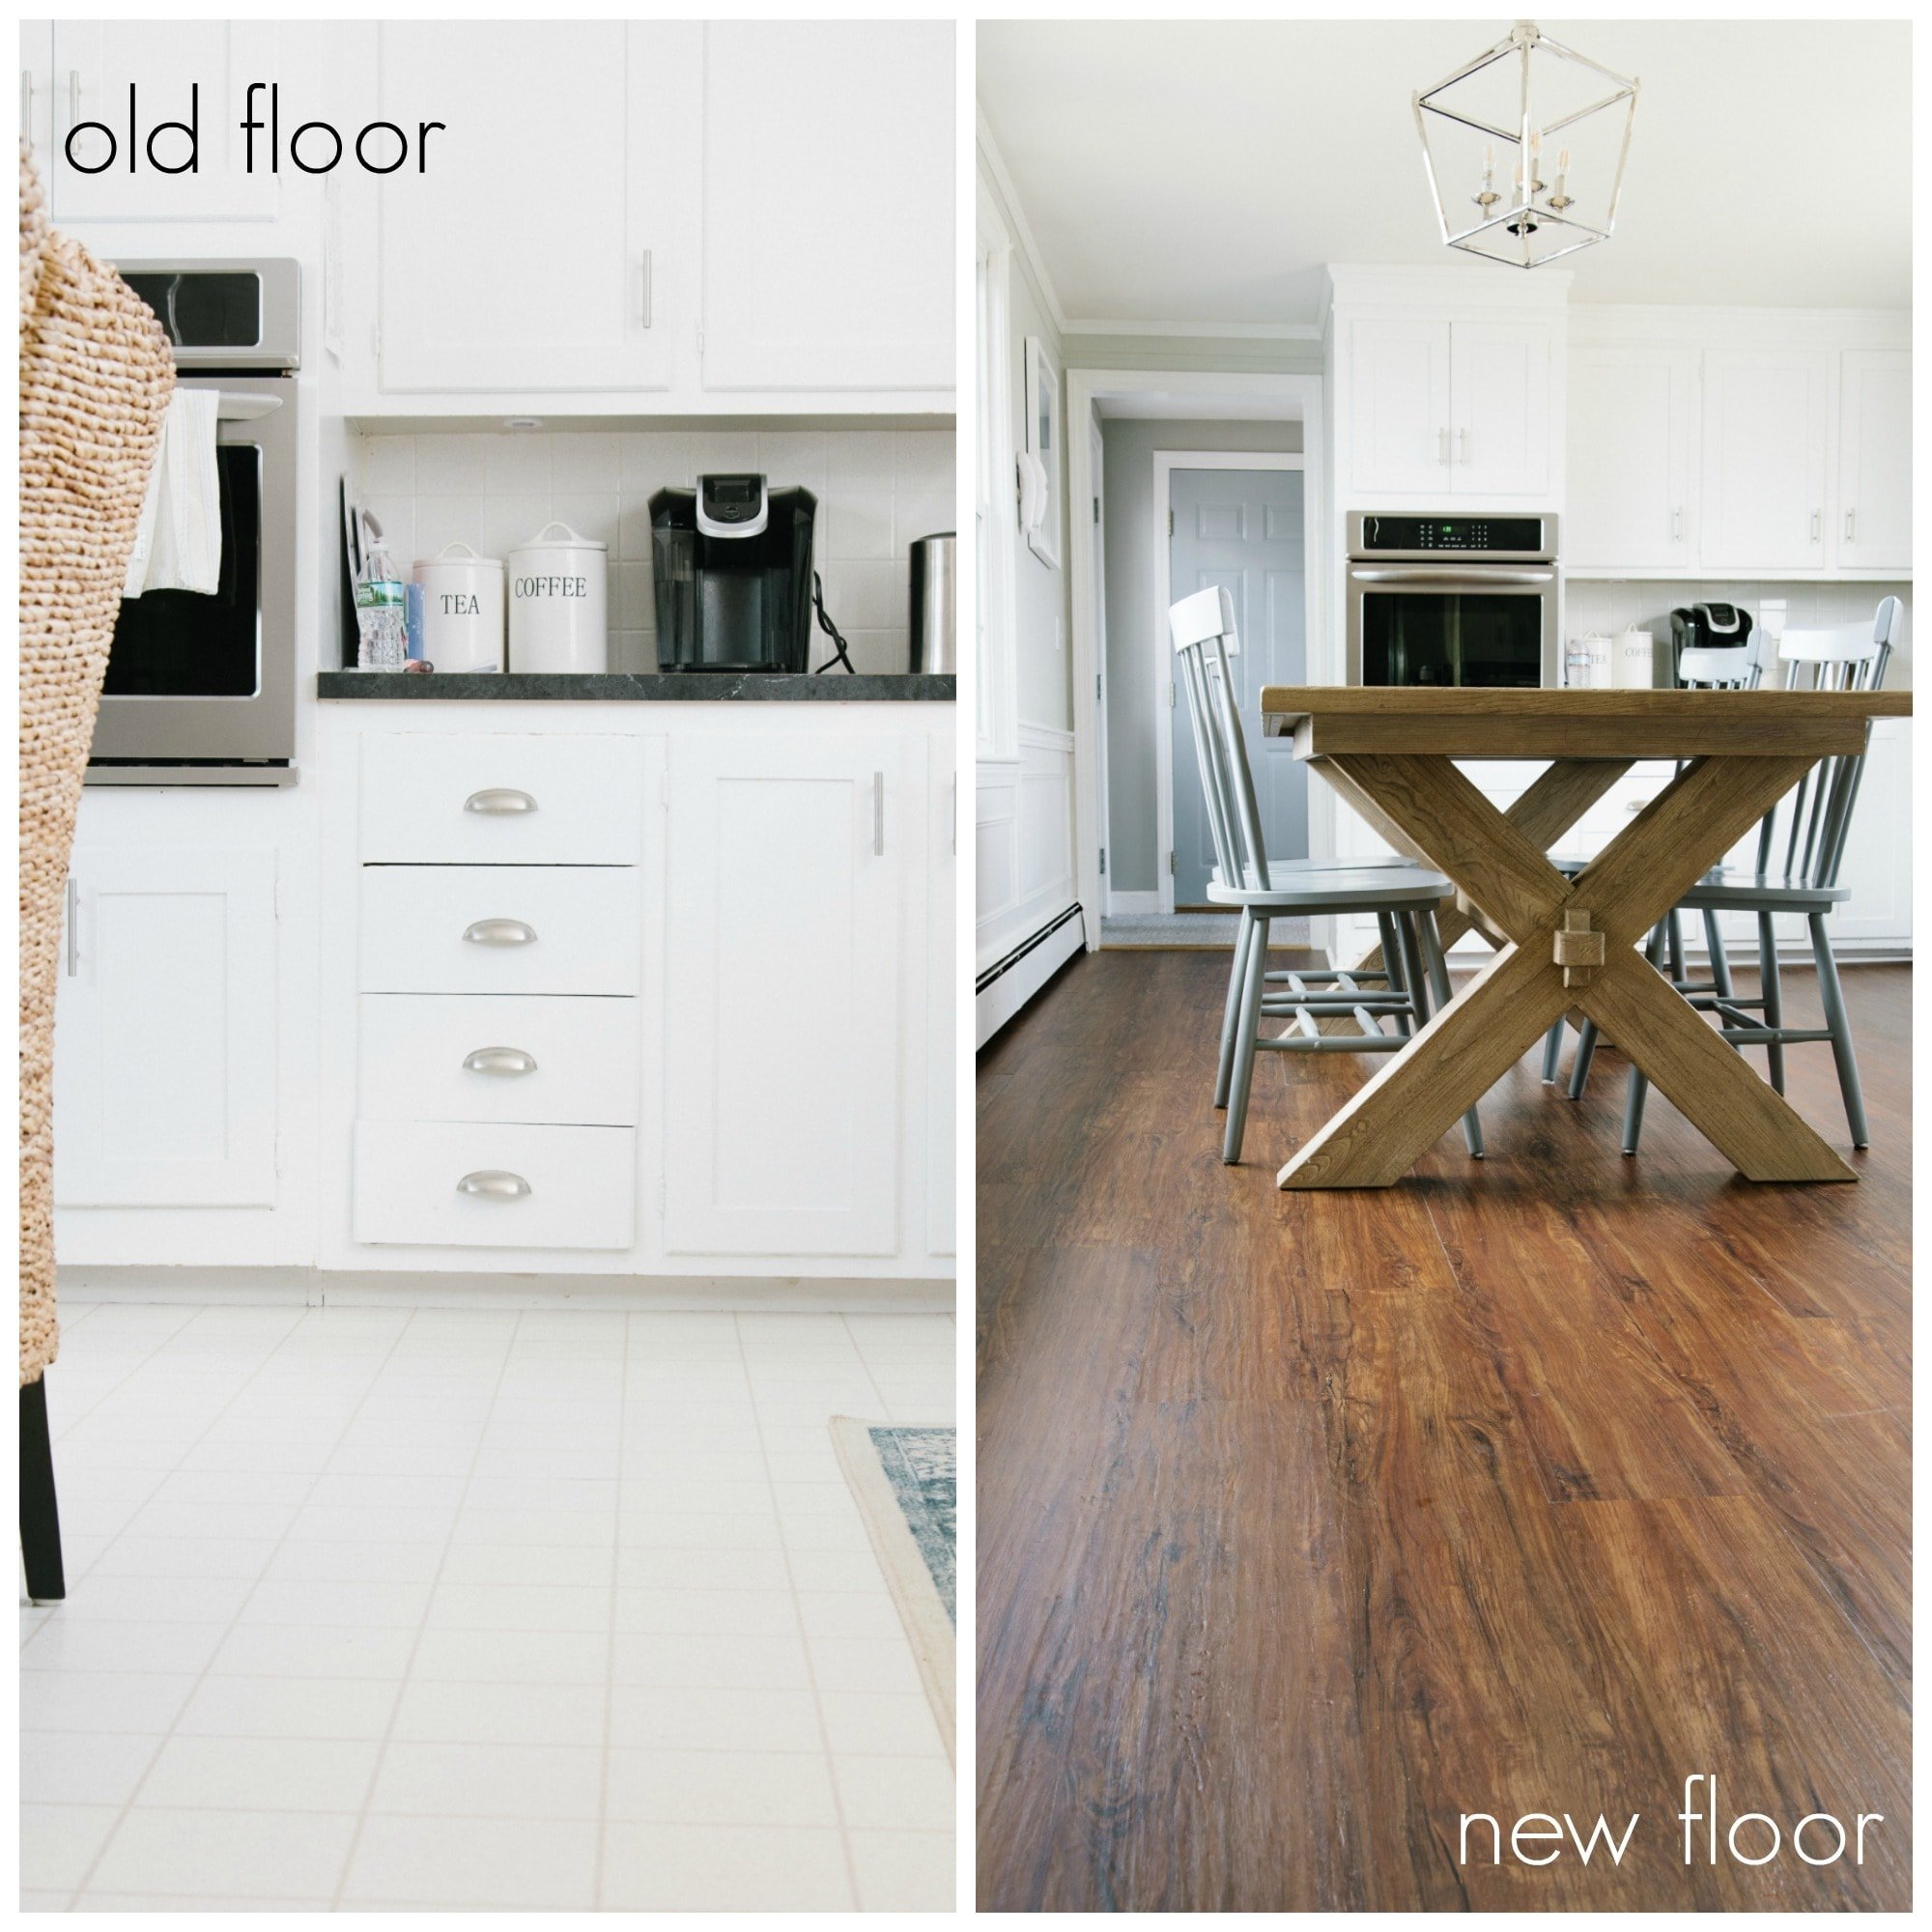
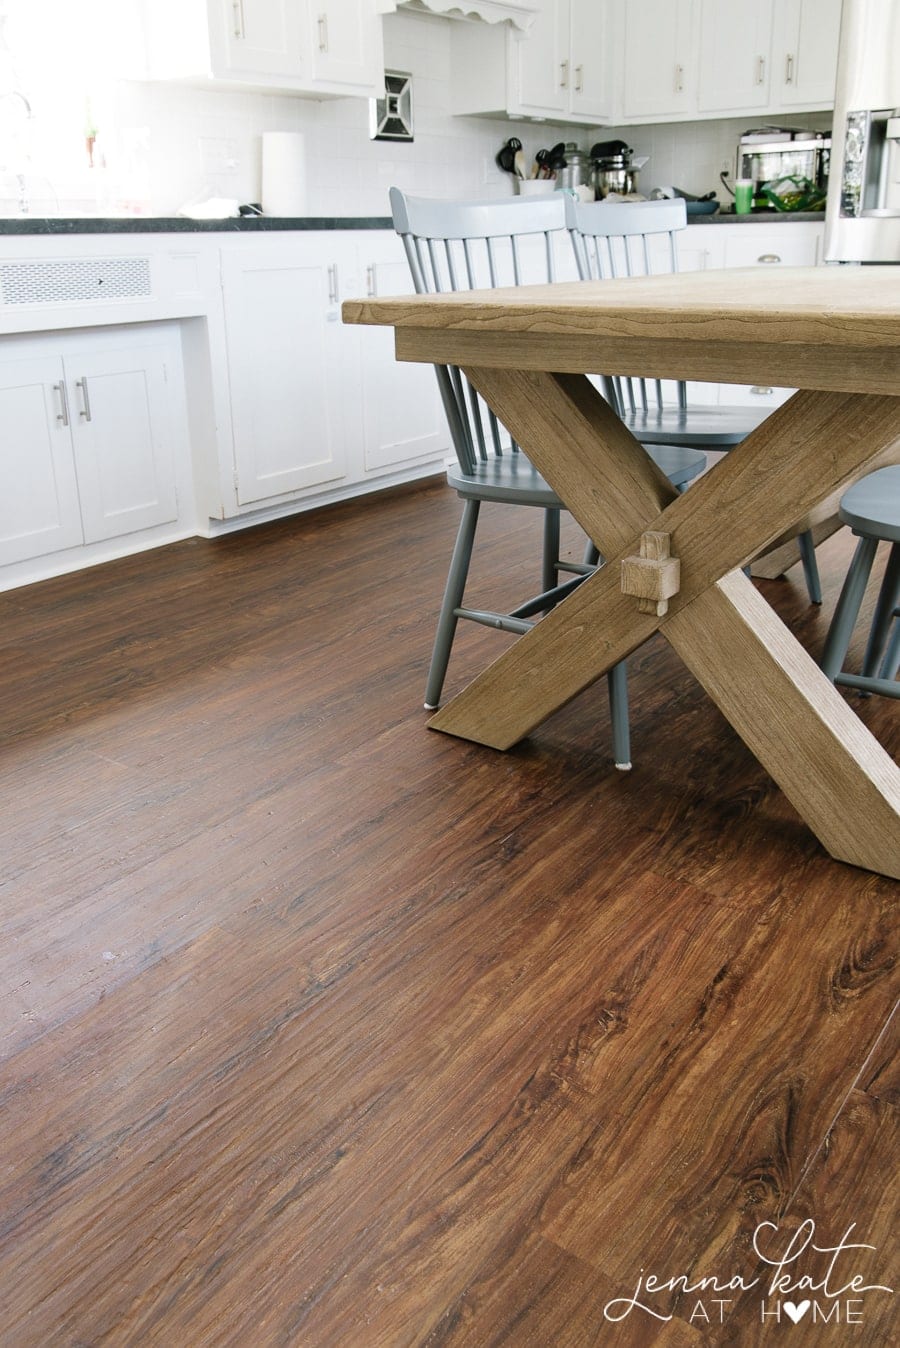
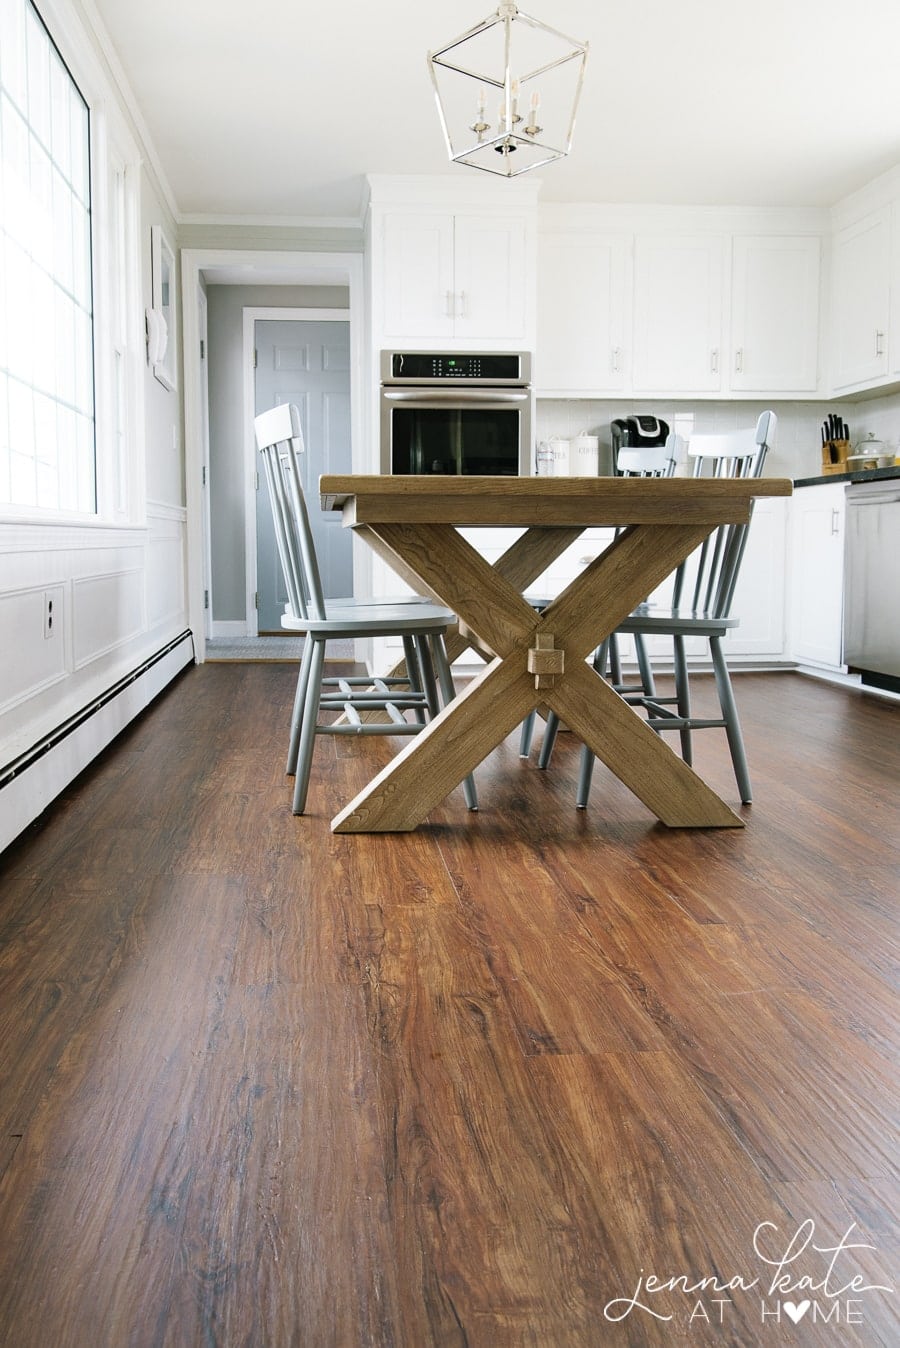
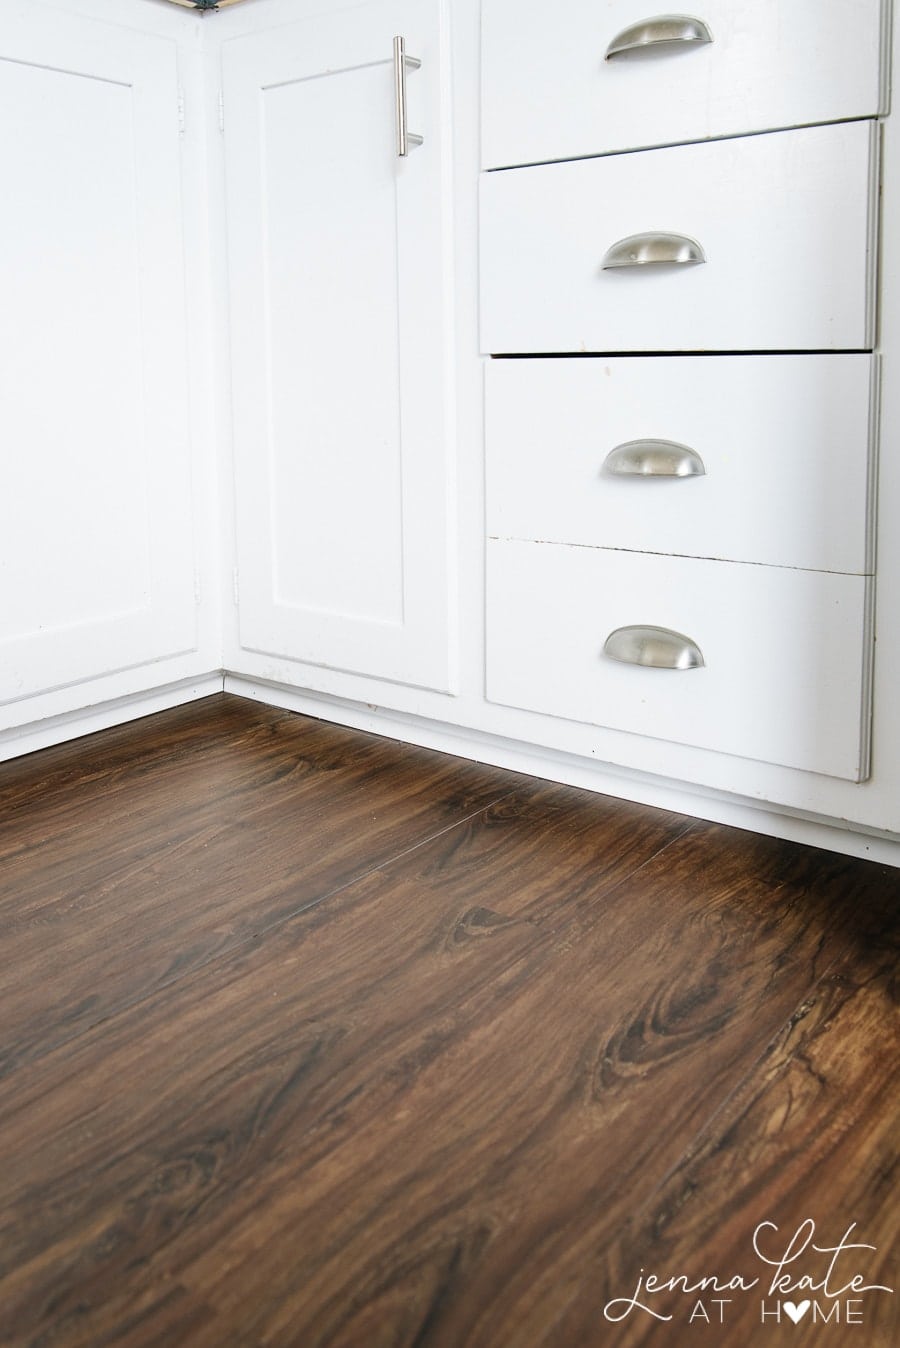
We've reach Week 3 of the Jeffrey Court Renovation Claiming and the floor is done! Woohoo!! And what a transformation it is!
Are you familiar with Luxury Vinyl Plank floor? It looks similar wood, is easy to install, waterproof, and so easy to make clean. It'south also virtually indestructible and a good solution if you demand affordable flooring.
If y'all've never installed luxury vinyl plank flooring, don't let anyone scare y'all away from it. It's so incredibly easy to install. Honestly, it's very beginner DIY friendly because yous need piffling to no tools (and just a fleck of common sense!) to install it.
I'm at domicile with my kids every day and I managed to go our adequately large kitchen finished in 3 naptimes. That'south about 7 hours in total, from start to finish with a few breaks thrown in!
While the more often than not installation process is very direct-forward, there are a few things that I learned and figured out along the mode that volition help you lot possibly exercise it even quicker than that.
Practise You Need Underlayment for Vinyl Plank Flooring?
If you are laying vinyl plank flooring over an existing floor such equally tile or linoleum, then no underlayment is needed. If yous are installing straight over a subfloor, then you will demand to install a moisture barrier first. Underlayment is optional in all situations only does let for more than absorber and noise assimilation.
How to Install Vinyl Plank Floor
Before I start, it's important to know that I was dealing with 4mm thick luxury vinyl plank (LVT) flooring. This thickness of plank is designed to "score and snap" meaning you score it with a utility knife, and then bend the plank until it snaps along the line. Thicker LVT planks that accept built in underlayment and other features crave ability tools to cut so some of the tips I'm going to share won't necessarily use.
This type of flooring floats and tin be installed direct over an existing floor. In our example, there's a possibility of asbestos underneath our linoleum then laying these planks right over it meant we didn't demand to worry about that.
Nosotros chose the color Cider Oak from the Home Decorator'southward Collection available in stock at Home Depot. The boxes are crazy heavy, though, and so I highly recommend having it shipped to your home.
Picking a Starting Point and Direction To Flow The Planks
This is an important showtime stride no affair what type of flooring you're about to install - real wood, LVT, laminate or tile. Y'all always need to figure out the direction. The general train of thought is to run the planks the longest way in society to make the infinite expect larger.
Still, if yous are matching to an existing floor that is running the reverse direction or starting on the long side would mean more difficult cuts than if the planks were running the other way, feel gratis to do the contrary. Only put some thought into it before you lot get-go.
For this flooring, running the LVT planks lengthwise was optimal because information technology meant less cuts overall. Which meant I could lay the flooring downward more quickly. Information technology is running the opposite direction to the flooring that it meets in the hallway, but since at that place will be a transition piece - and every room in my home seems to have hardwood that flows a different direction - I'grand happy with my decision.
How to Cut The Planks
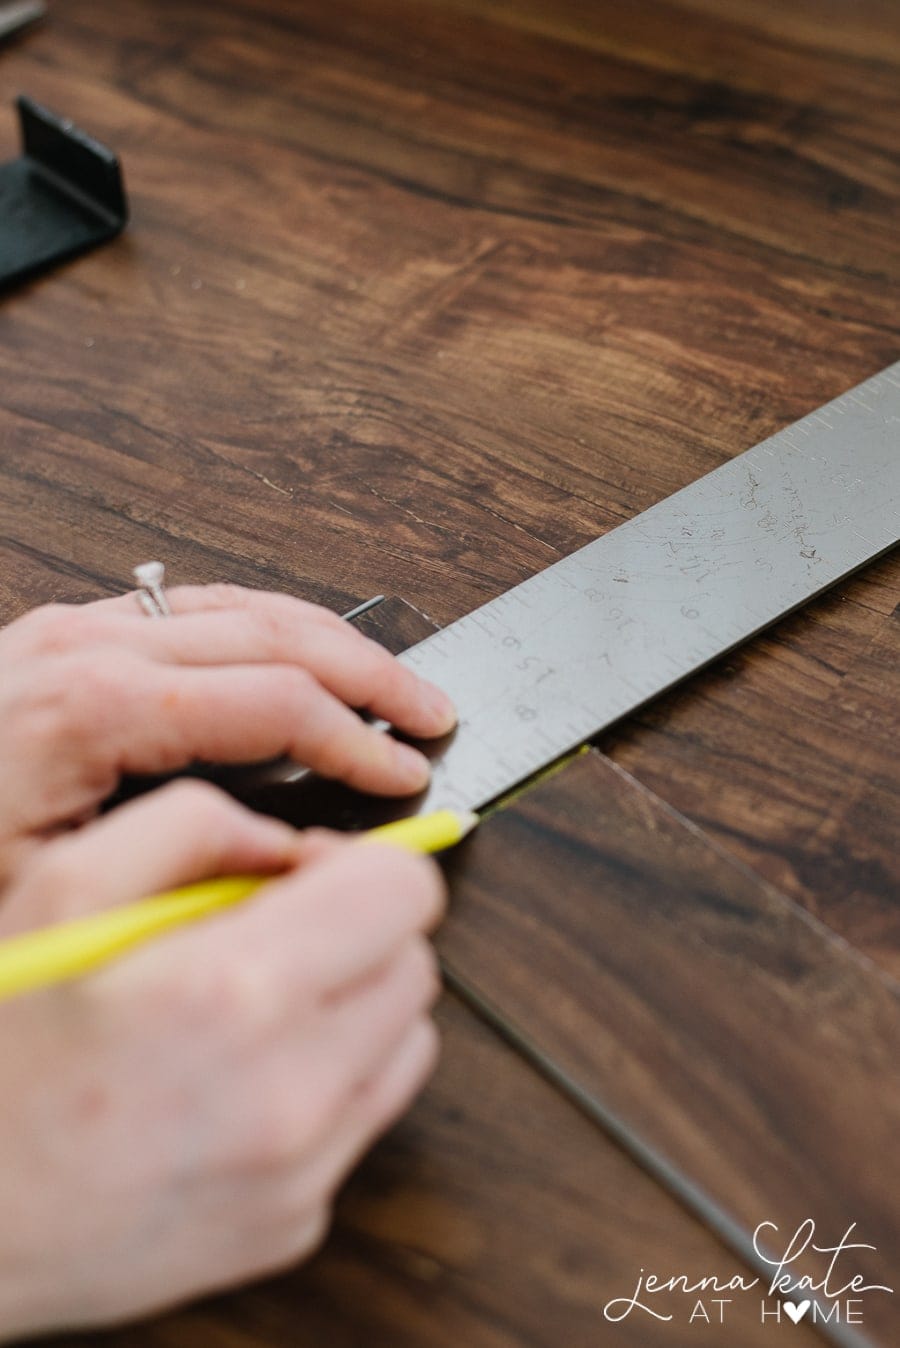
Brand sure you lot have a new blade on your pocketknife, a abrupt border (a metal speed square is ideal), a pliers and a colored pencil.

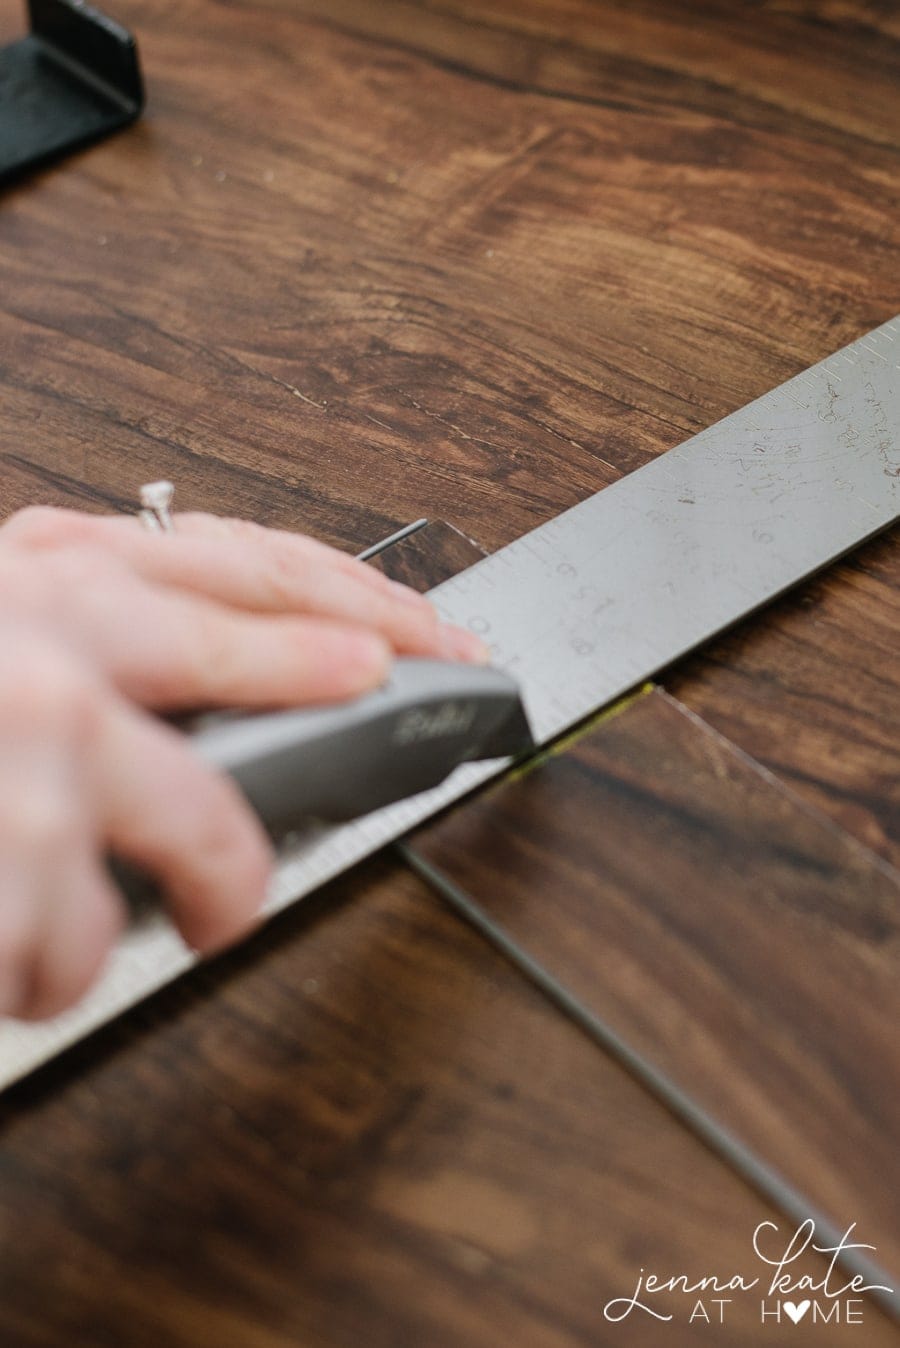
Cut a straight edge is very like shooting fish in a barrel. Measure where yous need to cut, marking the line with a colored pencil using your speed square, so score forth the line. Practise this on the printed wood side of the plank, not the bottom. I similar to re-score nearly three more times to make sure that I've scored securely plenty. Then bend the plank and so that it snaps along the line. Easy!
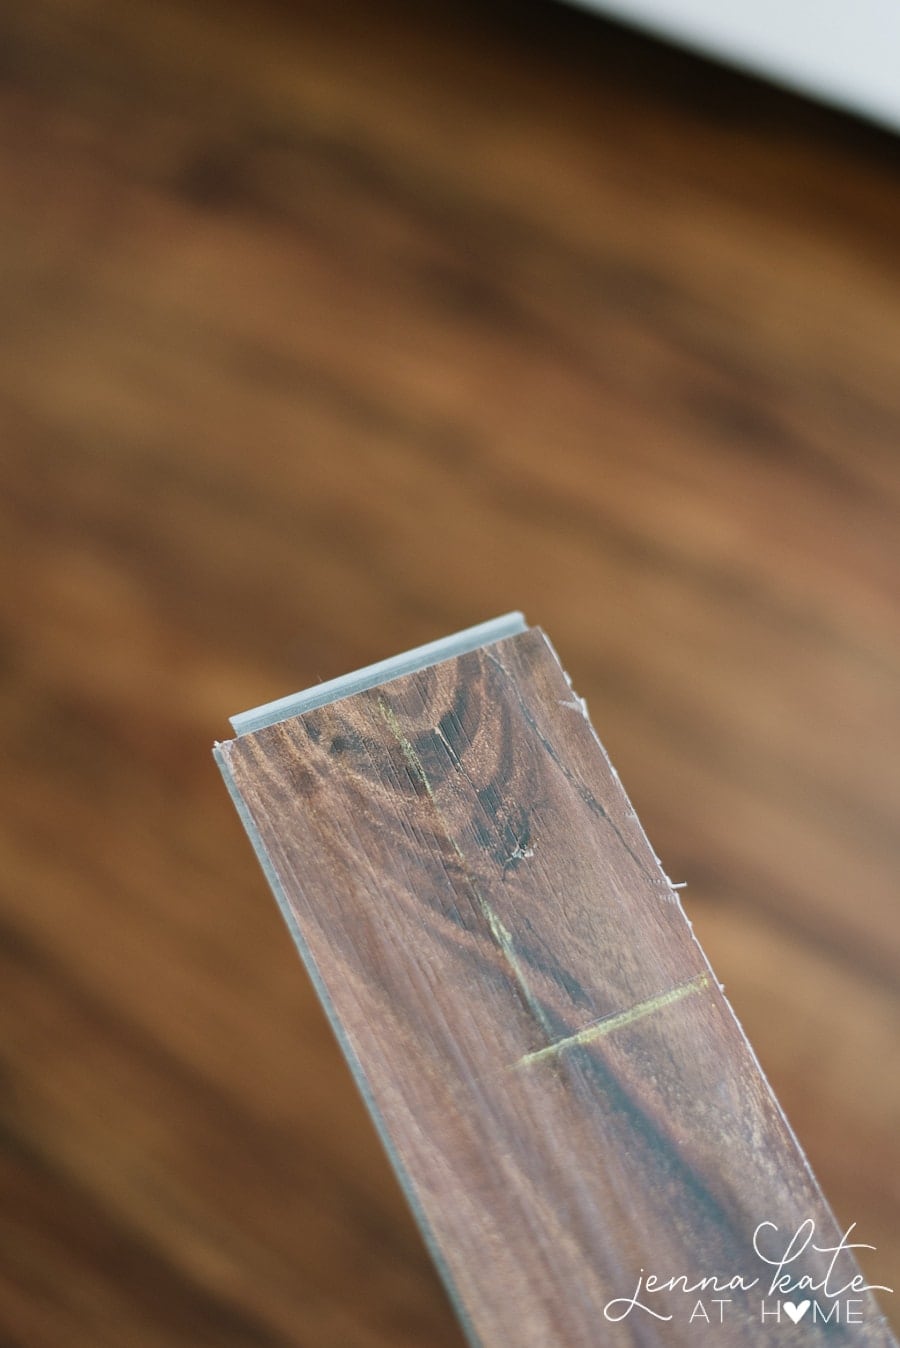
Cutting irregular shapes for corners, baseboards etc, is a little more involved just notwithstanding piece of cake plenty. Measure/describe the outline of the shape that needs to exist cut out of the plank. Using your speed foursquare as much as y'all tin can, score the outline of the shape. This time, instead of angle the plank to snap it - which is difficult when you're dealing with picayune bits that demand to be removed, grab the pliers and snap the pieces off with it.
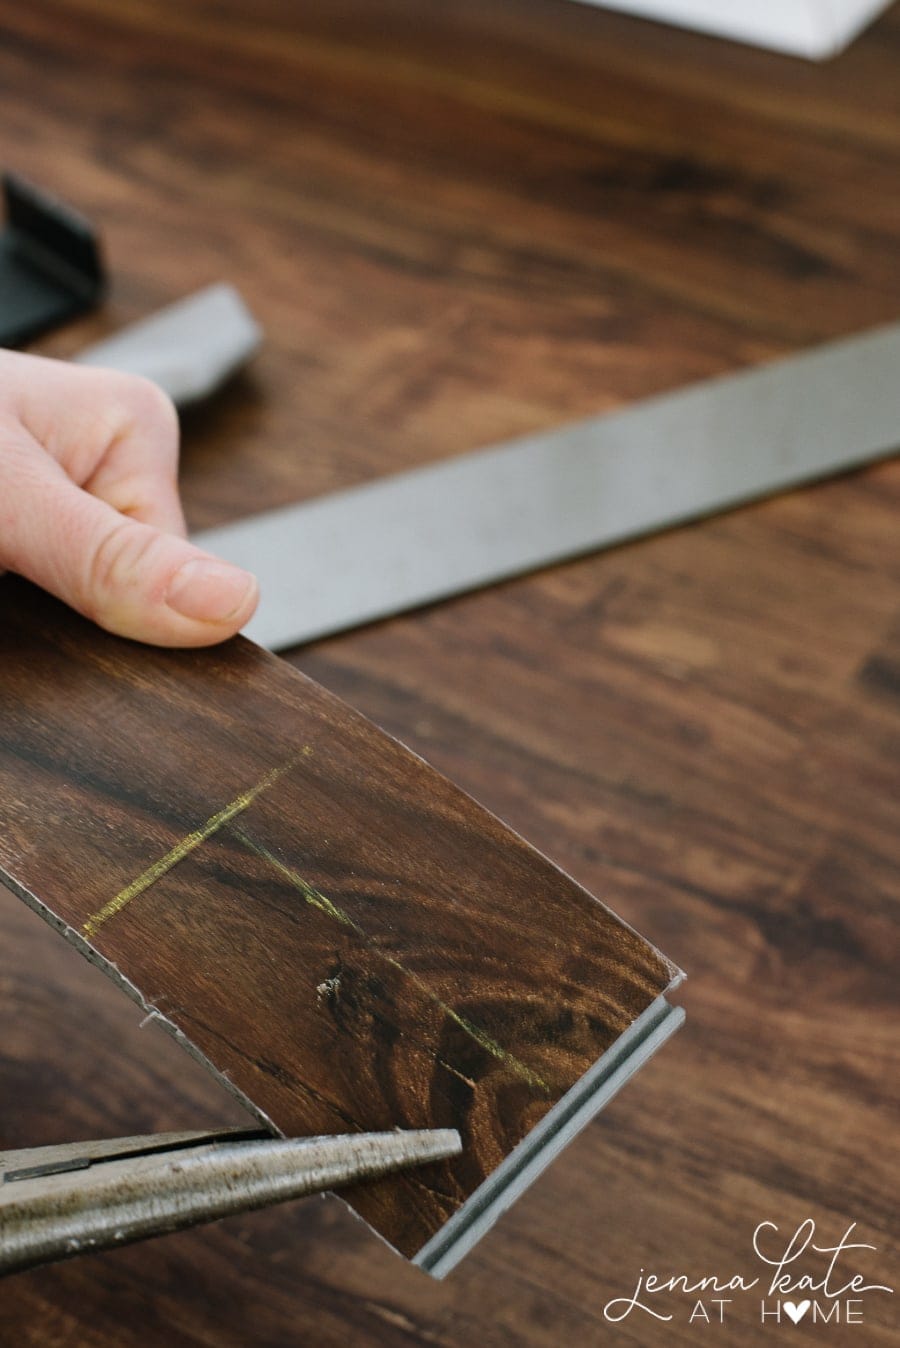
When you are initially starting, besides as when you start a new row, you will want to cutting off the natural language.
Y'all can score it get-go and so slide the utility pocketknife down but I plant that information technology cuts and so easily that you don't need to score first. Just exist careful that you're cutting away from your trunk in instance your hand accidentally slips.
Ensure the Planks Click Together Correctly
If your planks are non correctly clicked together, your floor will be compromised. Not but will yous see grey lines throughout the floor simply h2o could seep underneath since it'due south not completely locked together to form a waterproof bulwark.
I used two tools to ensure that my the tongue and groove connect perfectly every time. A pull bar and a condom mallet.
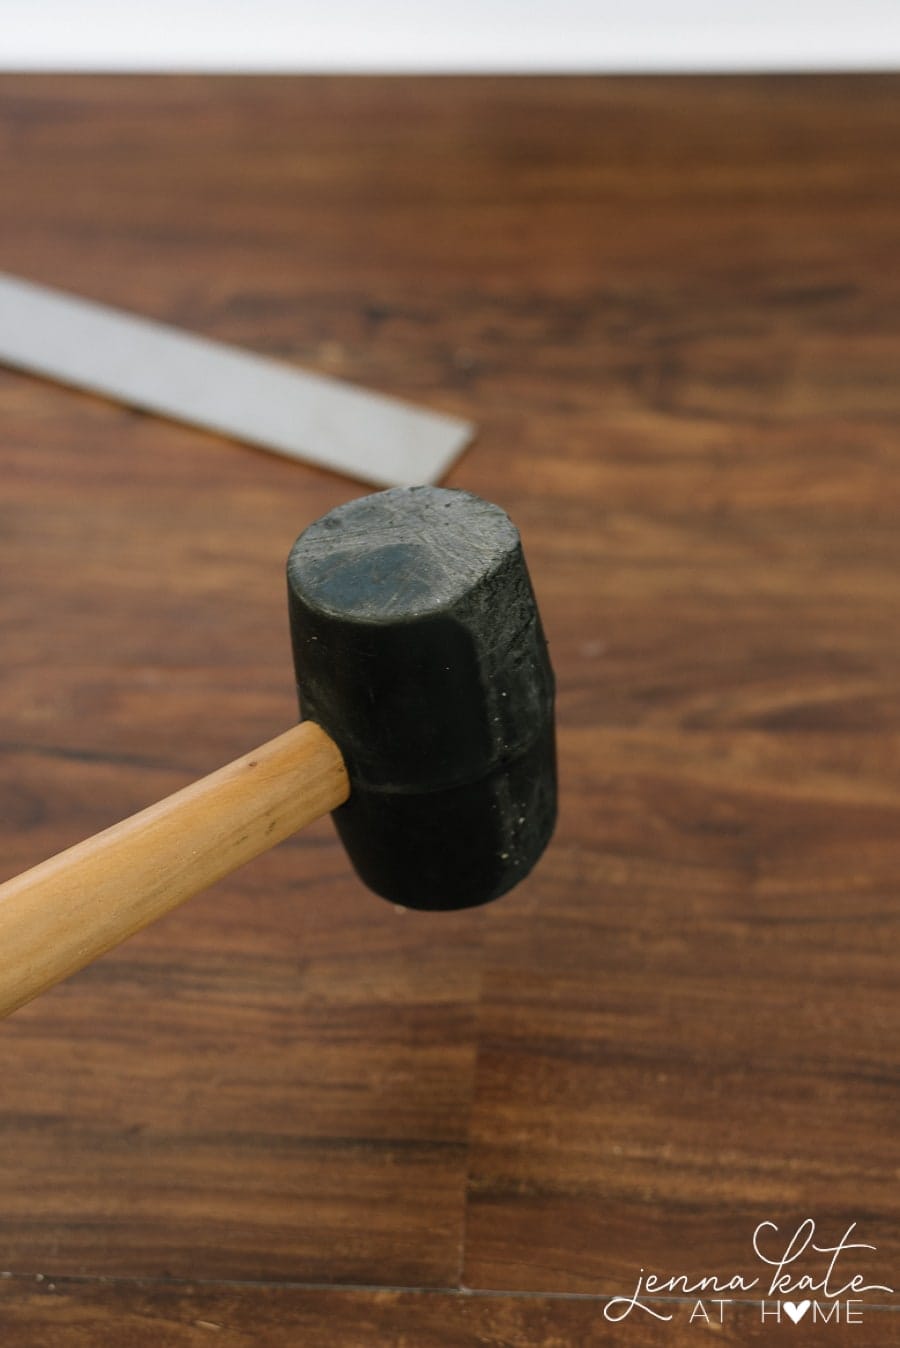
The safe mallet hammers down the short edges when they click together from left to right. Since it's condom, yous can really give them a skillful whack in lodge to get them flush.
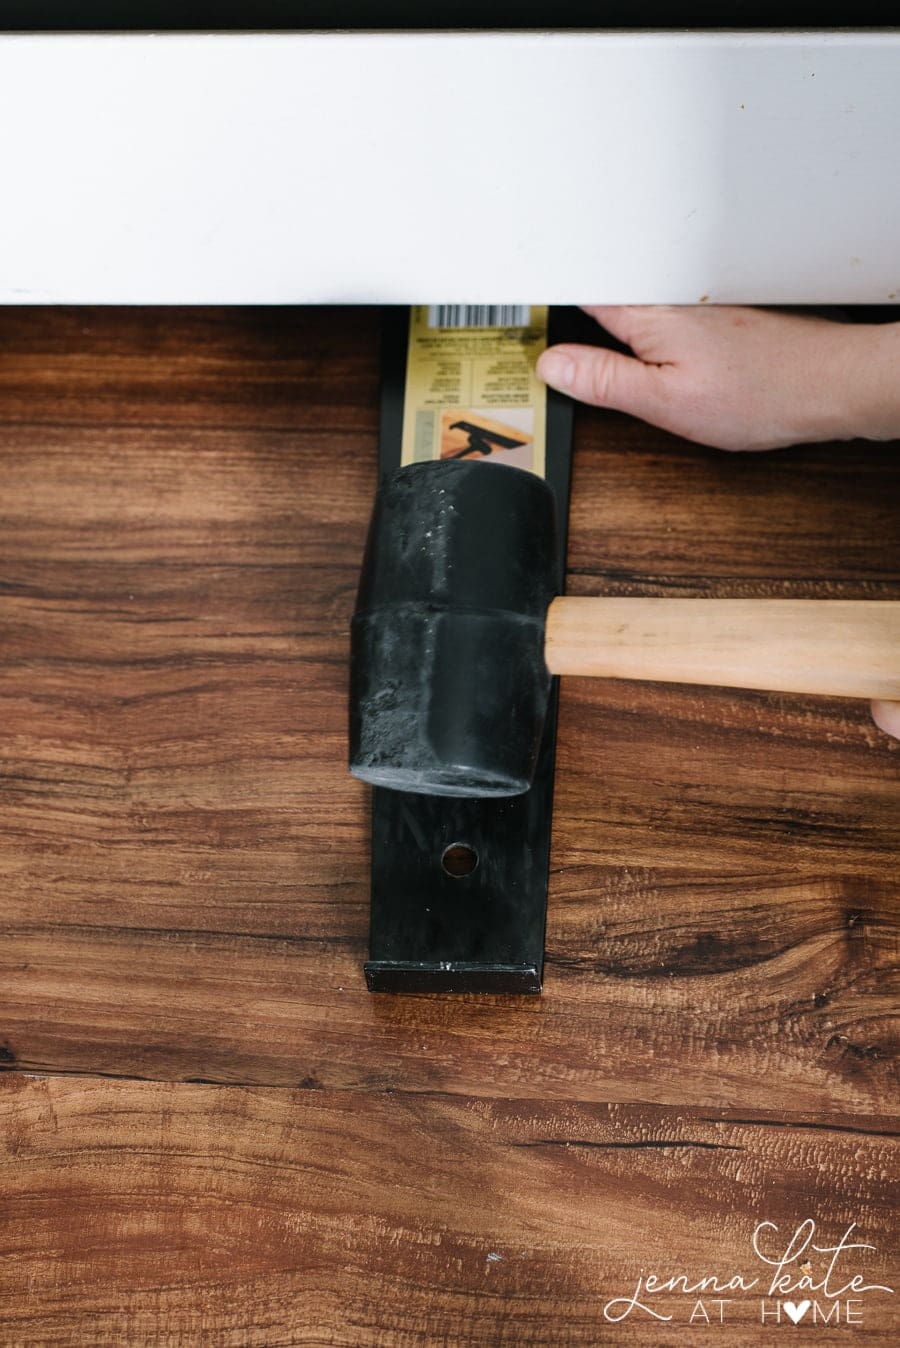
The pull bar is used to click the top top and bottom pieces together, again using the safe mallet with the pull bar. Just exist conscientious how hard you hit the mallet equally the metal pull-bar could damage the planks if too much force is used forth the sides. (The pull bar tin as well be used to slide the planks together on the sides only I constitute that they were very easy to slide into place without needing it. The simply time I did use it once or twice was for the very last plank in a row).
Secure the Edges
A gap of almost ¼ of an inch should be left on all sides to allow to expansion and contraction. This gap is easily covered with a strip of quarter circular along the edges. Transitions between dissimilar floors can be subconscious with a standard transition piece or a T-molding if there's a height difference. I used my blast gun to secure all these pieces in identify.
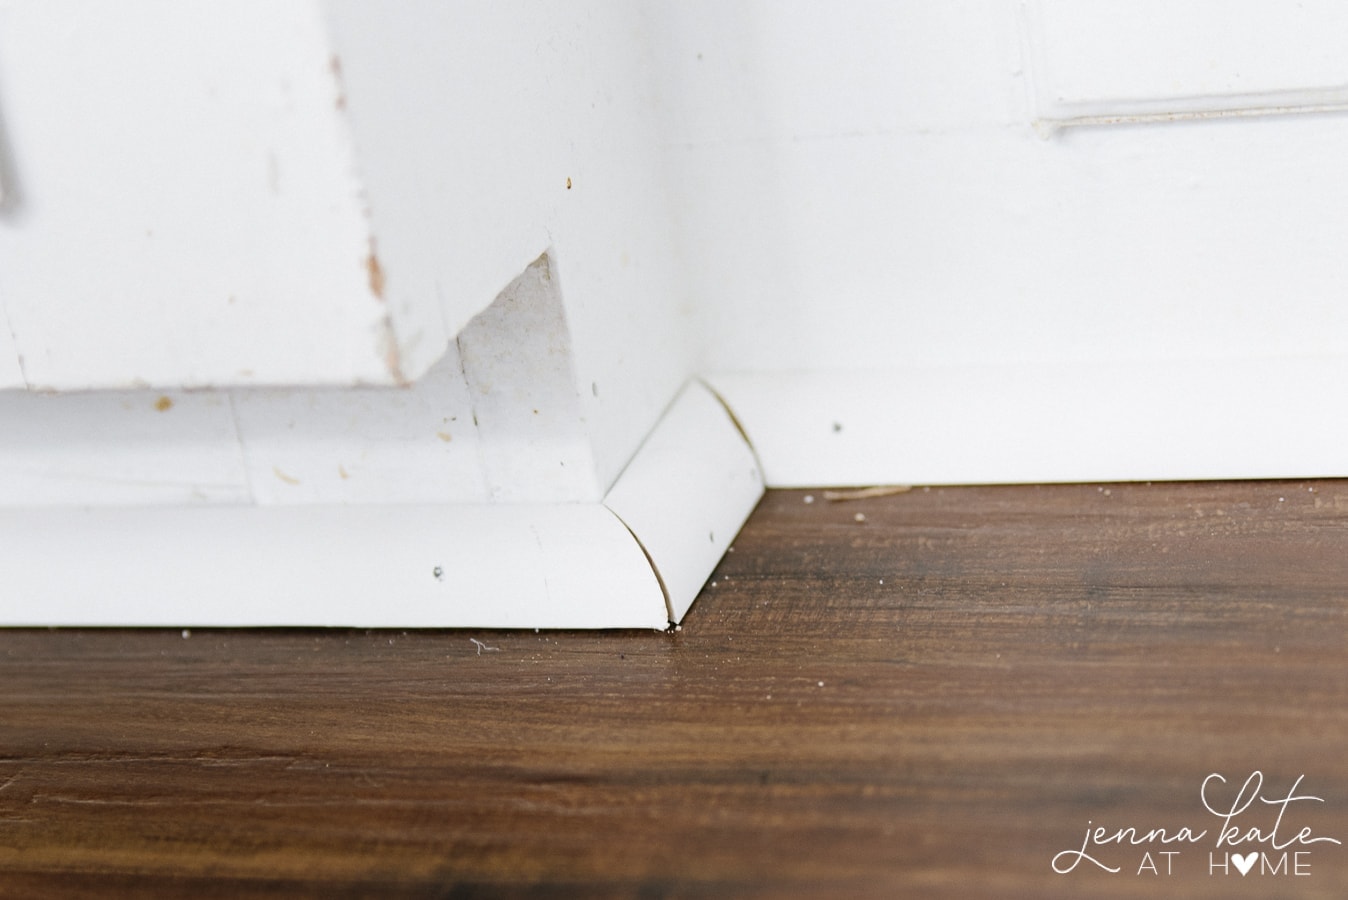
I withal have to fill all the blast holes with spackle and add together caulk to the seams. Once that's done, you won't even notice the little imperfections. If your kitchen has equally many 45 caste angles every bit mine does only yet not a single cabinet is level, you can't worry about 100% perfection with your cuts. Caulk is your friend!
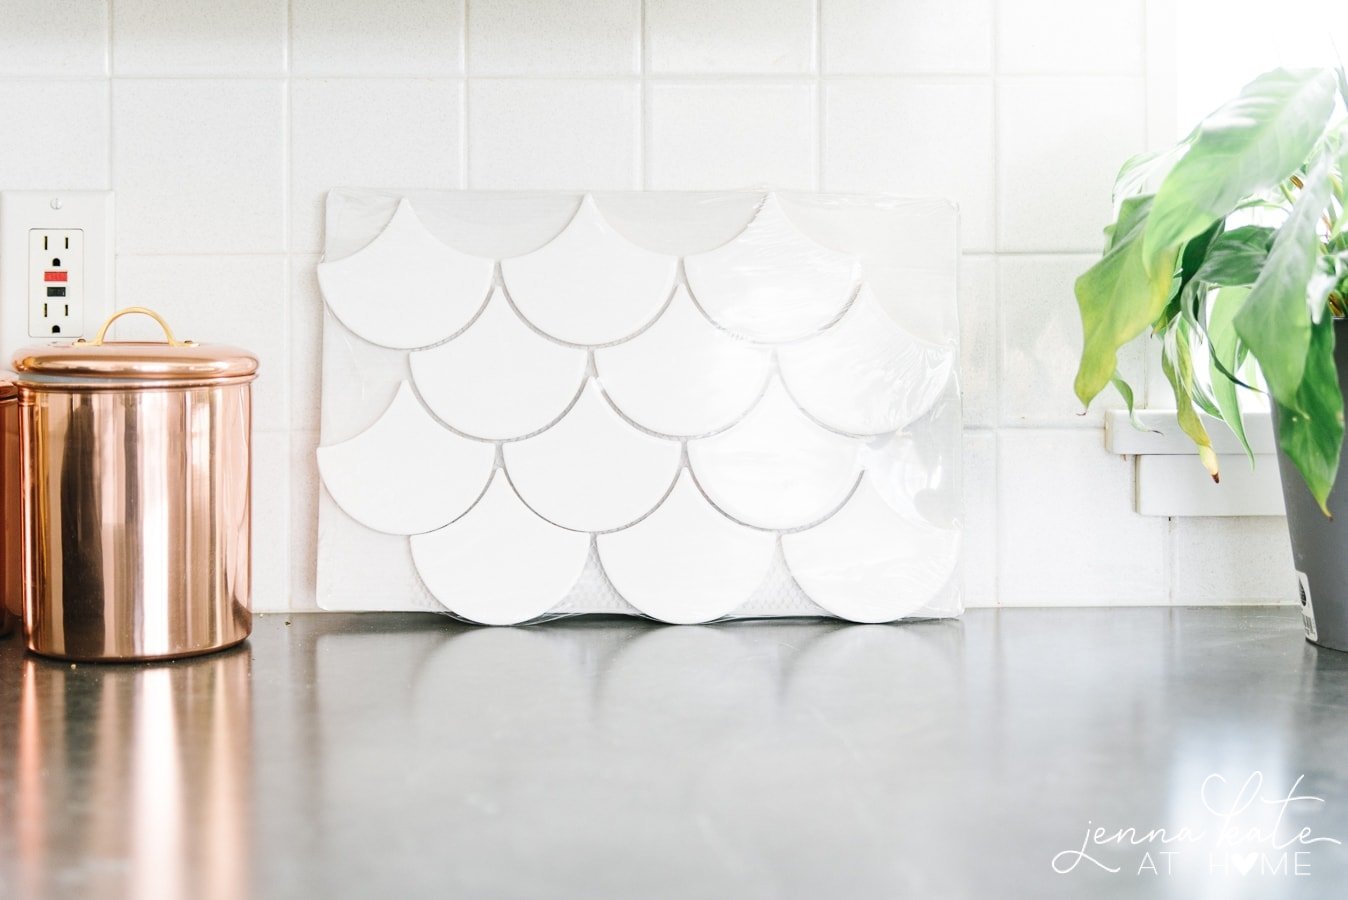
On another note, my tile arrived!! * happy trip the light fantastic toe*
Isn't she beautiful?
Demo on the former backsplash has but started only I take to wait for the electrician to do his thing before I can do much more. Luckily, he's coming tomorrow so the new backsplash volition be started this weekend!! Hopefully I'll take plenty done that I tin share some of information technology with you next week!
Materials
- 4mm thick luxury vinyl plank (LVT) flooring
- Quarter-round molding for edges
- Transition slice
Tools
- Utility knife
- Metal ruler or speed square
- Pliers
- Colored pencil
- Safe mallet
- Pull bar
- Nail gun
Instructions
- Decide on the layout and direction of the flooring planks. Usually, you run the planks the longest way in order to make the infinite look larger. Exceptions are if yous are matching to an existing flooring that is running the reverse management or starting on the long side would mean more than difficult cuts than if the planks were running the other way.
- Measure out where you lot need to cut, mark the line with a colored pencil using your speed square, then score along the line. Exercise this on the printed wood side of the plank, not the bottom. Re-score virtually 3 more times; then, curve the plank and then that it snaps along the line.
- To cut irregular shapes for corners, baseboards etc, measure/draw the outline of the shape that needs to be cut out of the plank. Using your speed square, score the outline of the shape. This time, instead of bending the plank to snap it, grab the pliers and snap the pieces off with it.
- When yous are initially starting, as well every bit when you start a new row, you volition want to cut off the natural language. Simply score and cutting (no pliers needed).
- Make certain the tongue and groove of every plank connect properly by using a pull bar to marshal them and a safe mallet to hammer them down.
- Secure the edges by leaving a gap of near ¼ of an inch on all sides to allow to expansion and contraction. This gap is easily covered with a strip of quarter round along the edges.
- Finally, utilize a standard transition piece or a T-molding betwixt rooms if there'due south a summit deviation. Adhere with a boom gun.
Notes
If y'all are laying vinyl plank floor over an existing floor such equally tile or linoleum, and so no underlayment is needed. If y'all are installing directly over a subfloor, then you will need to install a wet barrier first.
Need to catch up on past weeks of the kitchen makeover?
Week i: The Before
Calendar week ii: The Kitchen Design Programme
Ready to vote? Click here to aid me win a dream vacation!
Source: https://jennakateathome.com/how-to-install-luxury-vinyl-plank-flooring/
Posted by: mieleyouresser.blogspot.com
0 Response to "How To Install Home Decor Flooring Vinyl Flooring"
Post a Comment